
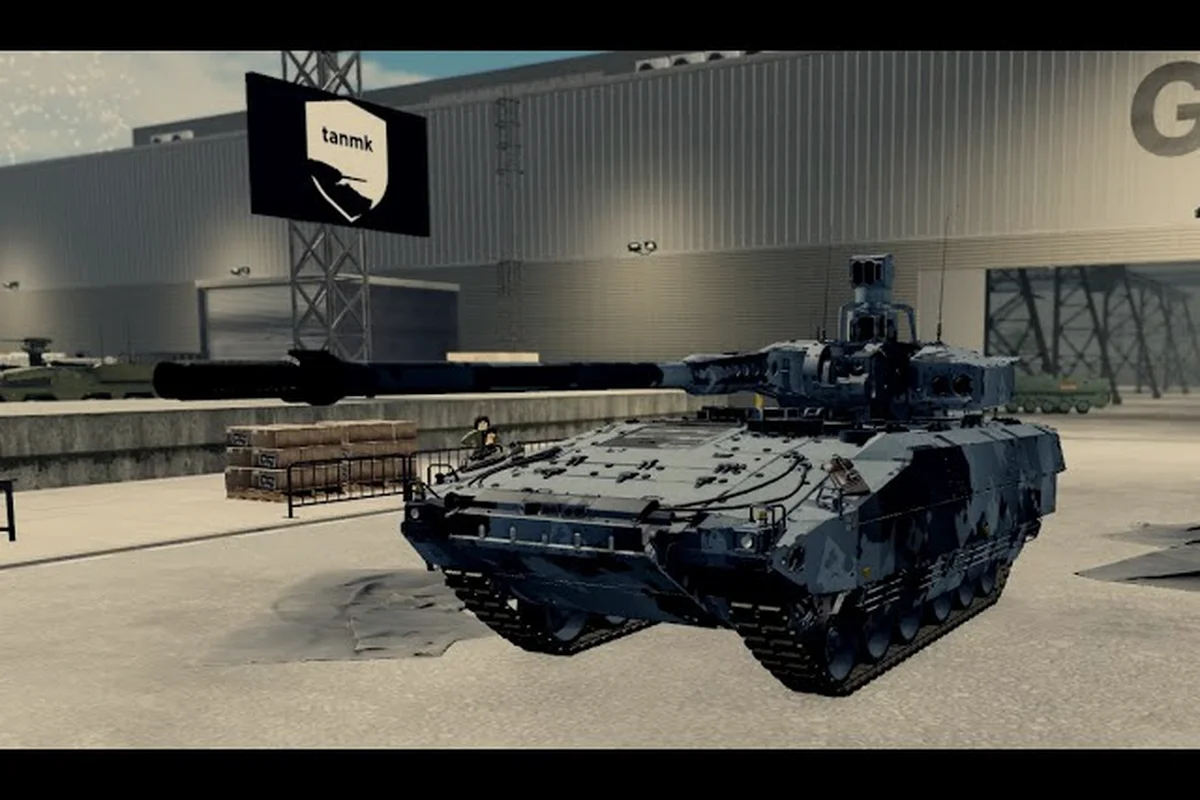
Learning cursed tank simulator how to make op tank is the single biggest skill gap between players who dominate matches and those who get shredded in the first thirty seconds. The game's entire identity revolves around module mixing — the official Roblox page describes it as "create your very own cursed tanks by mixing and matching modules and fight with other players." Unlike most tank games where you grind toward a fixed vehicle, this one lets you bolt a tier 12 cannon onto a tier 4 hull if you want. That freedom is exactly why some builds feel unstoppable while others fall apart.
The difference comes down to understanding how armor, engine, turret, cannon, and track modules interact with each other. A massive gun means nothing if your engine can't carry the weight, and a heavily armored hull becomes a coffin when your turret rotation speed can't track fast targets. This guide breaks down the module system, the research progression, and the exact loadout formulas that produce overpowered results.
The Core of Cursed Tank Simulator Tank Customization
| Tier | Tank | Role / Notable Trait | Survivability Note |
|---|---|---|---|
| 8 | IS-7 | Heavy brawler | Strong armor profile for its tier bracket |
| 10 | M1 | Main battle tank | Balanced firepower and mobility |
| 11 | Leclerc | Main battle tank | Most survivable tank in community tier data |
| 11–12 | M1A2 SepV3 | American monster | Top-tier firepower and armor ceiling |
| 12+ | P.1000 Ratte | Super-heavy land battleship | Meme pick; extreme size and HP pool |
| 12+ | M109 | Self-propelled artillery | Indirect fire support; situational use |
Before you can build anything overpowered, you need to understand the five module slots that define your vehicle. Every tank in the game uses the same five-slot architecture: armor, engine, turret, cannon, and tracks. The magic of cursed tank simulator tank customization is that these slots accept modules from any tier, so you're never locked into a "correct" pairing.
| Module Slot | What It Controls | Why It Matters for OP Builds |
|---|---|---|
| Armor | Total HP, damage reduction, weight | Determines how many hits you survive |
| Engine | Speed, acceleration, power-to-weight ratio | Determines if you can reach positions first |
| Turret | Rotation speed, gun depression, view range | Determines how quickly you can engage targets |
| Cannon | Damage per shot, penetration, reload time | Determines if you can actually kill enemies |
| Tracks | Turning speed, terrain resistance, traverse rate | Determines agility and ability to flank |
The key insight from community testing is that weight balance matters more than raw stats. Players report that pairing a heavy armor module with a weak engine creates a vehicle that can't climb hills, while a powerful engine on a light hull produces a glass cannon that flips when turning at speed. The research report from the community highlights that tiers run from 1 to 12+, with players climbing from light low-tier tanks to top-tier main battle tanks — and the module combinations are what make that climb survivable.
Reading the Module Tier List Correctly
The cursed tank simulator module tier list isn't a simple "higher tier equals better" ranking. While tier 11 and 12 modules obviously outperform their lower-tier counterparts in raw numbers, the cost-to-performance ratio changes dramatically at certain breakpoints. A tier 8 module that fits your playstyle will outperform a tier 11 module that fights against your build's strengths.
How to Unlock Modules Through Research
The research system gates your access to higher-tier modules, and understanding how to unlock modules efficiently is critical for building OP tanks early. Modules unlock through a combination of player level, in-game currency, and research points earned from matches. The progression guide on this site covers the XP mechanics in detail, but the module-specific path works like this:
-
Reach the required player level — each module tier has a minimum level requirement, typically starting at level 5 for tier 2 modules and scaling to level 60+ for tier 12 modules.
-
Earn research points — you gain these from completing matches, with winning teams earning roughly 50% more than losing teams. Daily missions also award bonus research points.
-
Spend credits to research — once you meet the level requirement and have enough research points, you spend credits to permanently unlock that module for your garage.
-
Purchase the module — after research, you still need to buy the module with credits before you can equip it. This is a common trap where players research something they can't afford to equip.
The research tree is linear within each module type, meaning you must unlock tier 3 armor before tier 4 armor becomes available. However, you can research different module types in parallel, so a smart progression strategy alternates between armor and cannon research to maintain combat effectiveness while climbing.
The Grind Efficiency Problem
Most players hit a wall around tier 6 modules because the research costs spike dramatically. Community data suggests that tier 6 research takes roughly three times longer than tier 5, and the jump from tier 8 to tier 9 is even steeper. This is where the progression guide becomes essential reading — it covers the XP multipliers and daily routines that cut your research time significantly.
The most efficient approach reported by veteran players is to specialize in two module types rather than trying to research everything evenly. Focus on armor and cannon first, because those provide the most immediate combat benefit. Engine and tracks can lag behind by two or three tiers without hurting your effectiveness, and turret research can wait until you've identified your preferred engagement range.
Constructing the Optimal All-Round Loadout
Once you understand how to unlock modules, the real work begins: assembling the best cursed tank simulator tank loadout for your playstyle. There's no single "correct" build, but there are proven archetypes that consistently perform well in matches. Each archetype prioritizes different module slots and requires different playstyles to execute effectively.
Close-Range Brawler: Trading Mobility for Firepower
The brawler is designed for close-to-medium range combat, trading mobility for raw firepower and survivability. This build uses heavy armor modules, a high-damage cannon with decent penetration, and a turret with good gun depression for fighting over ridges.
| Module Slot | Recommended Tier | Key Stat Priority |
|---|---|---|
| Armor | 2-3 tiers below max | HP and damage reduction |
| Engine | 3-4 tiers below max | Enough power to move the armor |
| Turret | 1-2 tiers below max | Gun depression and rotation speed |
| Cannon | Max tier available | Damage per shot, penetration |
| Tracks | 2-3 tiers below max | Traverse rate for close-quarters turning |
The brawler excels on maps with urban environments or tight corridors where you can force enemies into close-range engagements. Your armor absorbs hits while your cannon deletes opponents in two or three shots. The weakness is obvious: you're slow, and skilled enemies will kite you at range.
Glass Cannon Sniper: Max Firepower, Minimum Armor
The sniper loadout trades almost all survivability for extreme cannon performance and turret accuracy, making it the glass-cannon king of cursed tank simulator. You pair the highest-tier cannon you can unlock—ideally the Tier 5 Railgun if you’ve completed the research modules grind—with a turret that boasts top-tier accuracy stats, like the Stabilized Sniper Turret. To keep weight down for better engine performance, you strip armor down to the bare minimum, often running a lightweight chassis with zero plating. This lets you outrange and out-damage brawlers before they close the gap, but one direct hit from a howitzer will likely end your run, so positioning and map awareness become your real armor.
Community videos like The BEST Guns In Every Tier - Cursed Tank Simulator by Brick highlight that cannon selection is the most impactful decision for this playstyle. The sniper loadout works best on open maps with long sight lines, where you can engage enemies before they even spot you. The trade-off is that any enemy who closes the distance will shred your thin armor.
The Scout Loadout
The scout is a speed-focused build that uses the lightest armor available, the most powerful engine, and tracks optimized for turn rate. The cannon is typically lower-tier because the goal isn't to kill enemies outright — it's to spot targets for your team and harass enemies from unexpected angles.
This build requires the most skill to play effectively because you have almost no margin for error. One mistake means instant death. But a skilled scout can single-handedly win matches by keeping the enemy team spotted while your snipers and brawlers pick them off from safety.
Signature Combos: Regeneration, Alpha Strike, and Speed Demon
The difference between a good loadout and a truly OP tank comes down to module synergies — combinations where the whole performs better than the sum of its parts. These synergies are what the community calls "cursed builds," and they're the reason videos like This Game Lets You Build The Most CURSED Tanks Ever! by KaceUp attract thousands of views.
The Regeneration Combo
Some armor modules include passive HP regeneration as a hidden stat. When you stack multiple armor pieces with this property, the regeneration rate compounds. Players report that a full regeneration build can recover roughly 15-20% of your max HP between engagements, effectively making you unkillable in sustained fights.
The catch is that regeneration armor tends to have lower raw HP values, so you're gambling on surviving the initial burst. This combo works best on brawler builds where you can break line of sight and wait for your HP to recover before re-engaging.
The Alpha Strike Combo
This synergy pairs high-damage cannons with turret modules that reduce reload time. While the damage per shot stays the same, the effective DPS increases dramatically. Community testing shows that a tier 10 cannon with a tier 8 reload-reduction turret can out-DPS a tier 11 cannon with a standard turret.
The trade-off is that reload-reduction turrets typically have worse gun depression and rotation speed, making you vulnerable to fast flankers. A light tank or hovercraft closing to within 50 meters can easily circle you, since your turret traverse can't keep pace with their strafing. This combo shines in defensive positions where you can control engagement timing—anchor on a ridgeline or hull-down spot, and the reduced reload lets you out-damage any opponent who peeks your sightline. Position poorly, however, and the 10–15% reload gain becomes worthless as you're tracked and farmed by a faster, more agile adversary.
The Speed Demon Combo
The speed demon pairs the lightest armor with the highest-tier engine and track modules to create a vehicle that outruns everything on the map, but this build only works if you've grinded the research tree to unlock the Mk. V Turbine Engine and Reinforced Alloy Tracks—without those specific module slots filled, your top speed caps out at 42 km/h and the whole strategy collapses. The cannon is secondary — you're building for mobility, not firepower, so a lightweight auto-loader with 60mm penetration is enough to harass heavy tanks from behind while they can't turn their turrets fast enough to track you.
This build is devastating on capture-the-flag modes and maps with wide flanking routes. You can reach positions before the enemy team even spawns, giving you map control from the first second. The weakness is that any direct engagement ends badly, so you must always control the terms of combat.
Testing Your Build Against the Meta
Building an OP tank on paper is one thing; proving it in combat is another. The current meta shifts with every major update, and what works today might be obsolete tomorrow. The HOLD THE LINE update introduced new tanks and balance changes that reshuffled the tier list, and the Vanguard update adjusted module stats across the board.
The best way to test your build is to run it in public matches and track your performance metrics. Pay attention to your win rate, average damage per match, and survival time. If your build consistently delivers above-average results over 20+ matches, you've found something viable.
Community videos like The ACTUAL Best Guns in CTS by KatForce provide valuable data on which cannons perform best in the current patch. Cross-referencing community tier lists with your own testing is the most reliable way to stay ahead of the meta curve.
When to Abandon a Build
Sometimes a build concept doesn't work in practice, and you need to know when to cut your losses. The sunk cost fallacy is real in this game — you'll be tempted to keep forcing a build because you invested credits and research points into it. But if a build loses consistently for 10+ matches, the problem is likely the build, not your execution.
The most common build-killing issues reported by players are weight imbalance (engine can't move the armor), reload too slow (cannon underperforms despite high damage), and turret too slow (can't track fast targets). If your build has any of these issues, swap out the problematic module and test again before giving up entirely.
Frequently Asked Questions
What is the fastest way to unlock high-tier modules?
The fastest path is to focus on daily missions and win matches, since winning gives roughly 50% more research points than losing. Specialize in two module types instead of spreading research across all five. The module system guide covers the daily routine that maximizes research efficiency.
Can I make an OP tank without high-tier modules?
Yes, but you'll need to exploit synergies. A tier 6 build with perfect module synergy can outperform a tier 8 build with poor synergy. Focus on regeneration armor or reload-reduction turrets to maximize the value of your available modules. The best setup guide has more details on budget-friendly builds.
Why does my build feel slow even with a high-tier engine?
Check your total weight — armor modules add significant weight, and if your engine's power-to-weight ratio drops below a threshold, acceleration and top speed both suffer. Try swapping to a lighter armor module or a higher-tier engine. Track modules also affect terrain resistance, which impacts speed on soft ground.
Should I prioritize cannon damage or penetration?
It depends on your target. Against lower-tier tanks, damage matters more because you'll pen reliably. Against same-tier or higher-tier tanks, penetration is critical — a high-damage shot that bounces deals zero damage. Carry a mix of ammo types and learn which enemies require which rounds. The medium tanks list breaks down armor profiles by tank class.
How often does the module meta change?
Major updates typically shift the meta every 2-3 months. The HOLD THE LINE and Vanguard updates both introduced significant balance changes. Smaller patches can also adjust specific module stats. Check the official Roblox page for patch notes and follow community content creators to stay informed about the current best builds.